Bison Tactical Blog, Competitions
2020 Sniper Adventure Challenge
Aug
The Race

04SEP2020 – 05SEP2020 Tyler from Max Ordinate Academy and I spent approximately 35 hours doing Land Navigation across 30+ miles and a variety of random tasks in an attempt to complete the 2020 Sniper Adventure Challenge.
** Note, I am publishing this in uncompleted form since I never completed writing the post, but as we approach 2021’s match, the information may be useful for those considering competing in the match, so ask questions if you want to know more ***
The match this year was in Douglas Wyoming, a change from the last 3 years when it was near Casper, WY.
For 2020, our weather was HOT! Friday 97F and Saturday was 100F. Douglas hadn’t seen precipitation since June, and was in a major drought.
For details on the rules and a link to the Match website click the link below:
2020 Sniper Adventure Challenge by Competition-Dynamics
**Spoiler Alert – we finished 2nd place and for the 3rd year in a row ZERO teams officially finished the match.
2020 Sniper Adventure Challenge other coverage:
Prior Years Sniper Adventure Challenge Info:
- 2019 Last years match (8th Place)
- 2017 Match with Hugi (5th Place)
- 2016 Match with Scotty (3rd Place) (listen to a podcast about the match)
- 2015 My first exposure to the match as a Range Officer
This year the race was in a “Mission” format. The core stressor was land navigation with a map and compass, and was presented in a series of 3 total missions. A mission consisted of a set of coordinates (mandatory checkpoints) which had to be found in order and recorded properly on your score card. You were not given the next missions checkpoints until you had completed the previous mission successfully. Additionally bonus navigation checkpoints were available and were presented with each mission. These could be taken in any order once you received the coordinates for the bonus checkpoints.
In addition to the land navigation, there were also 25 “Challenges”. Challenges were tasks at certain coordinates. You were given the challenge coordinates at the beginning of the race, along with the times the challenges were “open”. Challenges fell into 3 distinct phases:
- Phase A – Friday 08:00 – 17:00 ONLY
- Phase B – Friday 20:00 – 06:00 Saturday ONLY
- Phase C – Saturday 08:00 – 17:00 ONLY
- Challenge #23/#24 were Phase C through end of the race
Challenges are optional with the exception of Challenge #0 which started the race. In addition to a LARGE list of required gear, you were able to store gear for use throughout the race in your cache bag.
Climbing Gear, Extra Water, Food, Spare shoes, Foot prep crap, Rain Gear, Cold weather gear and extra ammo were some of what we had stashed in our cache bag.
Due to the way the challenges were split and there being 3 missions it seemed fairly likely that the race was intended to be completed in 3 phases with Day1, Night and Day2 being the basic split.
To be a finisher this year meant completing ALL 3 Land nav missions, and scoring at least 50% of available points for 16 of the 24 scored challenges.
A note on the scoring… Here is the formula to calculate your score

Day 1
The scoring methodology above (in my opinion) is intended to encourage competitors to maintain a balance of both challenge points and land navigation points. If you score a lot of land nav points, but bypass challenge points then your score will be lowered, and vice versa.
Tyler and I decided right from the beginning we were going to accept the gauntlet and attempt to finish the SAC this year. That was a tough order, and ultimately we didn’t succeed, but it dictated our strategy for a good portion of the race. Because we were trying to finish, we needed at least 50% score on 16 challenges. During Phase A, only Challenges 1-9 were available, so we had to start by doing challenges.
All the competitors started at the Mission HQ which was the Wills Ranch in Douglas, WY.

C0 – Find your cache bag
Challenge #0 was the beginning of the race. The instructions were for one team member to be blindfolded, and when the signal was given the other team member had to verbally direct the blindfolded partner to the pile of cache bags where the blindfolded team member had to pick out his bag. Then both team members carried the cache bag to the new location about 1 mile down the road.

The main difficulty with this was the cacophony of teams ALL yelling to try to get their partner oriented to the bag. You had to pick out your team members voice from all the others, and being a bit late to the lineup, we started at the very far end of the line, at the farthest point away from all the bags possible!

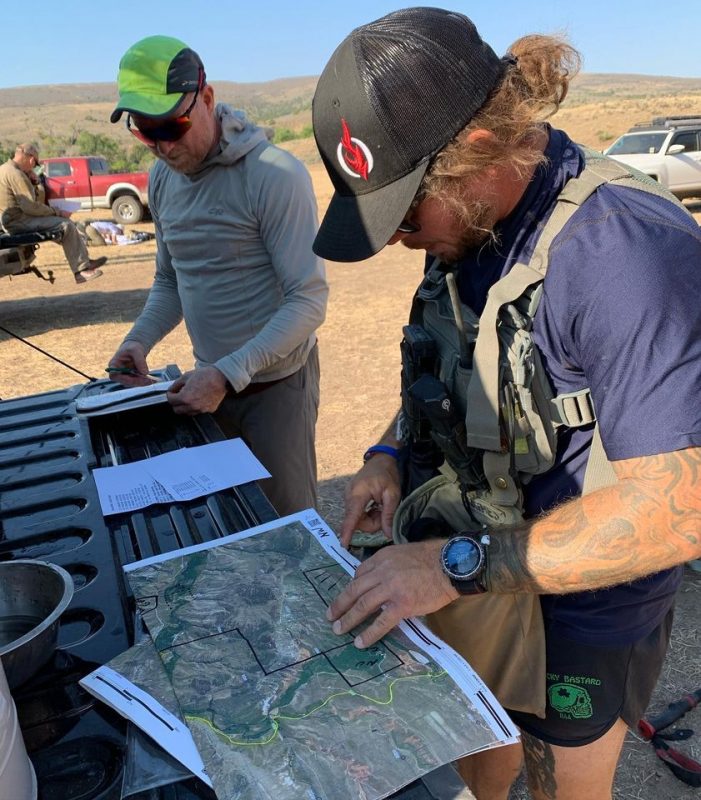
At the cache bag location, the match director distributed the Mission 1 checkpoints, the bonus checkpoints and the Challenge locations. We spent some time plotting checkpoints on our maps and making a plan.
Shooting Challenges
We started off with shooting challenges (C1-C4), and I feel like we pretty much rocked the shooting stages. After quickly bypassing C1 (which had people) we moved to C2 which was empty.
We continued to shoot stages C3, C4 and then back to C1. All of the shooting stages required the carbine shooter to shoot first this year, and to engage all targets he was going to engage before the precision shooter could start. All shooting stages had 8 targets to engage, however sometimes the target arrays were not able to be engaged from the same position and required the shooters to move between two different positions.
C1 – 2 sets of 4 targets, 2 positions, 3 min
The Range Officer for Challenge #1 was Joel Wise from Precision Rifle Network (check out the link in the beginning to his AAR on YouTube). He let us know we got the high score on this stage, which made us happy due in part to the great gear we run from companies like JP Rifles, Schmidt & Bender and Attack Pak.

The left target array was 2 sets of 2 targets each, with each set on an A-Frame made by AA Targets. The left target on each A-Frame was larger, and the right target was smaller. The first set of targets was around 190 meters, and the 2nd set was around 230 meters.

The right target array was 4 targets on a hillside, and the distances were much greater. Targets were approximately 400-600 meters.

We had shot C2-C4 before C1 and I had developed some issue with elevation, sending some shots significantly low on the prior stages. Because of this we came up with a strategy to let me engage the near targets, get 4 hits on the close targets, then not attempt the far targets, allowing Tyler to have more time to engage both the near and far targets. This strategy worked well for us, and we scored 12 impacts out of a possible 16 for 75% of available points – and earning up top score on this challenge.
For this stage, the terrain required standing shots at the near targets, while the far targets could be engaged prone. Since we had walking sticks, we used those for an improvised front support, and a single walking stick in the rear as a rear support. This was pretty stable, and worked for both of us.
C2 – C4

I don’t remember the details of these shooting stages individually, however I remember fragments of the stages. One of the stages had a zigzaggy 2-track road going up the hillside. Targets were scattered along that road, and started in the bottom land below our position. This made it difficult to transition between the targets because the low targets were hard to see. This required tall bipod legs, and we ended up sacrificing some of the pretty small low targets because they were difficult to hit.

Other Phase A Challenges (in the order we completed them)
C9 – Buddy Carry with gear
Challenge #9 was to carry your partner approximately 100 yards and back, along with all the teams gear. This was pretty easy at first, but after 100 yards (the way back) became fairly strenuous. Surprisingly, it didn’t really wear us out at all, so was well worth the points. Both team members had to perform the challenge for max points (100 points).
C8 – Army Low Crawl (through the creek)
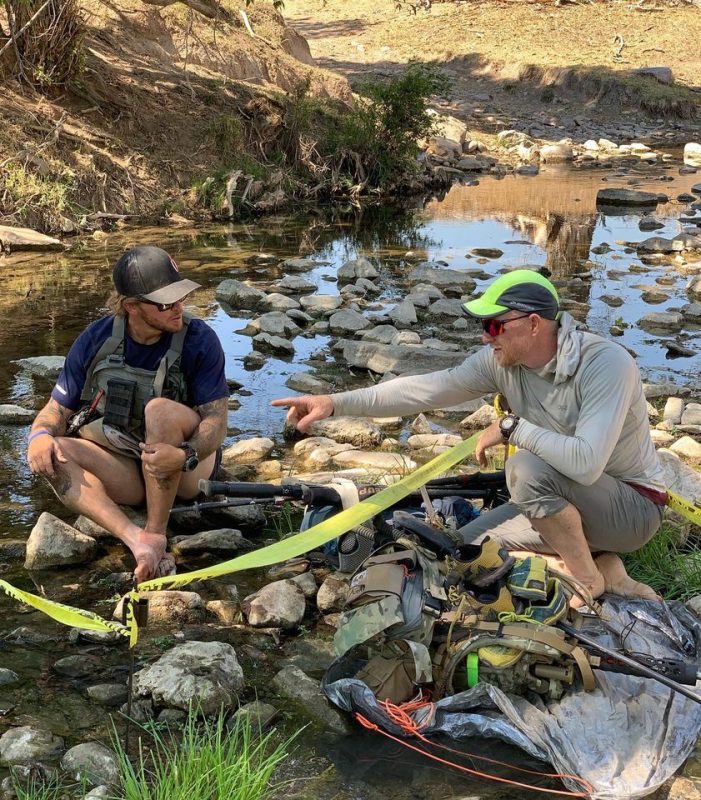
Both team members had to low-crawl with their gear under caution tape strung across a hill, going down and into the creek. You had to get all your gear and both team members to the finish. We tried to do it without getting wet, but were unsuccessful, and pretty much ended up soaked.
We did keep our shoes dry, but the cache bags were nearby so if we needed to we could pull gear from the cache bags.
C7 – 2 Man Saw
Challenge #7 was to cut a disk off one of the logs near the creek. These logs were cotton-woods, and were approximately 14″-18″ diameter. They had a metal handled 2 man saw, and you had 10 minutes to cut as many disks as you wanted. Each disk was worth 10 points. However if your disk split you had to start over again. If it split when it hit the ground the RO said he would give it to us. When we started some team before us has already begun a cut, so the log was about half sawn. We were not required to begin from scratch, so we started cutting away, and quickly realized this was going to be impossible for us to complete.
Once we realized it was impossible, we stopped, and snapped the half of the disk we had cut off the log. This way none of the teams after us could use the work we had done, and would have to start fresh on a new cut. Hopefully this would encourage them to move along, since this challenge was a time waster for all the teams (I don’t believe any team was able to make a full disk cut in 10 minutes).
C6 – Rock Climbing

Rock Climbing was back in 2020! It was pretty easy climbing, I am guessing maybe 5.6 or 5.7 depending on what route you took. There were two top rope climbs which were pretty easy, and I think even novice climbers would have little trouble with the lefthand climb. The right climb had a short outcrop that made a overhang if you didn’t avoid it, but you could fairly easily go around. Tyler and I both did the climb in maybe 40 minutes or so.

Because it was so hot, gloves were really useful on the belay for the rappel down. Also, the rope had a tendency to pickup the cactus crap lying near the belay, so better to bring and use gloves for the belay.
C5 – Carry the T-Post up the hill.
Each team member had to take a T-Post from a pile, cross a creek and put it in place on a fenceline. The first people to get to the challenge got to place their T-Post low next to a close wooden fencepost, later teams had to go farther and farther up the hill/cliff to place their T-Post. Tyler and I were a bit later since we had shot all the shooting stages first. However we took this opportunity to fill water before starting out on the Land Nav mission.

Land Navigation
Before we dive into land navigation, I want to say our land nav this year was very solid. We were rarely very far off a point, and generally we found the points quickly. Besides the extra practice we put in this year, I think there are 2 things that made this work better for us this year.
#1 Our Maps


I believe I have been printing my own maps for this race since I first started competing in the match back in 2016. I use CalTopo which was designed for SAR and first responders. One of the really nice features is that CalTopo allows you to print custom sized maps and specify things like the scale etc.
First some of the issues I have with the MyTopo map you get from the race
- There are a confusing number of grid lines
- The data for the map is ancient (as old as 1949)
- I can’t modify, add or remove items easily
One of the main things I like to do on my maps is make them simple to read, and remove any clutter that might make it hard to read at night, since 1/3 of the race is in the dark. That means I use a white background, with just contour lines, and major features like roads powerline and railroads highlighted. I know water is going to be inconsistent with the map, so I lightly identify the waterways, and mark known good locations for water on my map.
Because water is such a big deal on this race, I double check water source locations using satellite imagery the week before the match to verify I have good water sources marked.
I use the Sentinel Weekly Hi-Res satellite imagery in CalTopo to verify.


These satellite images use infrared imagery and so False Color shows up water features much better than using real colors, and since they are weekly images, they are pretty reliable. Now if the race doesn’t bring you near the water, your on your own, but a little planning goes a long way in this match.
I use these images to mark water locations on the topo map, so we can easily find them.

As you might have noticed, I also mark the UTM grid intersections. In the above maps you can see for example “56|14” which denotes the juncture of “0456000 | 4714000”. I started doing this after watching a SAC winning team Tom Fuller & David Steinbach writing these on their maps during one the SAC’s a while back. The reason to mark these junctures is to save time opening and closing your maps constantly. If you don’t mark the junctions, you have to unfold the map to check the margin for the coordinate location which is printed on the edge of the map.
Finally I also print out Aerial maps of the race course. These helped a lot this year in determining the location of points (in trees or not, and relationship to actual roads or trails). What you will find is that the extremely old USGS scanned maps have incorrect road and trail locations. You can’t rely on that road data since this area is surveyed so infrequently.

Mission 1
After Challenge #5, we headed started our land nav. Because we spent a lot of time getting challenges I was feeling like we started a bit late, but in the end it worked out for us.
Mission 1 was mostly on the North side of the map.

We had just filled our water – I use a Hydrapak 3L Shapeshifter because it is light and works very well.
… Continued another time – this is all I could get done better something published than nothing! See you at the 2021 match!